Nuxt.jsで作成したページにログイン機構を作る
クリスマスなんて関係ない!!
この記事はFusic Advent Calendar 2017 25日目の記事です。
Fusicでは二ヶ月に一回くらいの頻度で「エンジニア開発合宿」と称して丸1日泊まり込みで自分の興味のある技術やガジェットに関する開発を行うイベントがあります(2017年12月時点)。
自分は、フロントエンドに苦手意識があるので(というか苦手)、javascriptのフレームワークを使ってアプリを作成したいと思い、
今回はNuxt.jsでログイン認証ができるところまでを実装しました。
プロジェクトの作成
1. vue-cliをインストール
Vue.jsを使う環境をいい感じに構築してくれるコマンドラインインタフェースをインストールします。
$ npm install -g vue-cli
2. vue init
プロジェクトの初期化を行います。
$ vue init nuxt-community/starter-template hello_nuxt

? Project name hello_nuxt
? Project description Nuxt.js project
? Author k-masatany <masatani@fusic.co.jp>

   vue-cli · Generated "hello_nuxt".

   To get started:

     cd hello_nuxt
     npm install # Or yarn
     npm run dev
作成されたプロジェクトに必要なnodeモジュールをインストールします。
$ cd hello_nuxt/
$ yarn
Hello, Nuxt.js
$ yarn dev
を実行して、 http://localhost:3000 にアクセスします。
下記のようなページが表示されるはずです。

認証機構のベースを作成する
基本的な部分は公式ページを参考にして、認証機構を構築していきます。 (細かい説明は公式ページに書いてあるので、作業内容を箇条書きしています。)
1. 依存パッケージをインストール
$ yarn add express express-session body-parser whatwg-fetch
2. server.jsファイルを作成
プロジェクトのルートディレクトリにserver.jsを作成します。
const { Nuxt, Builder } = require('nuxt')
const bodyParser = require('body-parser')
const session = require('express-session')
const app = require('express')()

// req.body へアクセスするために body-parser を使う
app.use(bodyParser.json())

// req.session を作成します
app.use(session({
  secret: 'super-secret-key',
  resave: false,
  saveUninitialized: false,
  cookie: { maxAge: 60000 }
}))

// POST /api/login してログインし、認証されたユーザーを req.session.authUser に追加
app.post('/api/login', function (req, res) {
  if (req.body.username === 'k-masatany' && req.body.password === 'demo') {
    req.session.authUser = { username: 'k-masatany' }
    return res.json({ username: 'k-masatany' })
  }
  res.status(401).json({ error: 'Bad credentials' })
})

// POST /api/logout してログアウトし、ログアウトしたユーザーを req.session から削除
app.post('/api/logout', function (req, res) {
  delete req.session.authUser
  res.json({ ok: true })
})

// オプションとともに Nuxt.js をインスタンス化
const isProd = process.env.NODE_ENV === 'production'
const nuxt = new Nuxt({ dev: !isProd })
// プロダクション環境ではビルドしない
if (!isProd) {
  const builder = new Builder(nuxt)
  builder.build()
}
app.use(nuxt.render)
app.listen(3000)
console.log('Server is listening on http://localhost:3000')
このサンプルコードではk-masatany/demoでしかログインできません。
3. package.jsonを更新
先ほど作成したserver.jsを読み込むようにします。
{
  "name": "hello_nuxt",
  "version": "1.0.0",
  "description": "Nuxt.js project",
  "author": "k-masatany <masatani@fusic.co.jp>",
  "private": true,
  "scripts": {
    "dev": "node server.js",  // ここと
    "build": "nuxt build",  // ここと
    "start": "cross-env NODE_ENV=production node server.js",  // ここ
    "generate": "nuxt generate",
    "lint": "eslint --ext .js,.vue --ignore-path .gitignore .",
    "precommit": "npm run lint"
  },
  "dependencies": {
    "body-parser": "^1.18.2",
    "express": "^4.16.2",
    "express-session": "^1.15.6",
    "nuxt": "^1.0.0-rc11",
    "whatwg-fetch": "^2.0.3"
  },
  "devDependencies": {
    "babel-eslint": "^7.2.3",
    "eslint": "^4.3.0",
    "eslint-config-standard": "^10.2.1",
    "eslint-loader": "^1.9.0",
    "eslint-plugin-html": "^3.1.1",
    "eslint-plugin-import": "^2.7.0",
    "eslint-plugin-node": "^5.1.1",
    "eslint-plugin-promise": "^3.5.0",
    "eslint-plugin-standard": "^3.0.1"
  }
}
その後、
$ yarn add cross-env
$ yarn dev
を実行してデバッグ環境を再起動します。
4. ストアを作成する
ユーザーの情報を保持するためのstore/user.jsを作成します。
import Vue from 'vue'
import Vuex from 'vuex'

Vue.use(Vuex)

// window.fetch() のためのポリフィル
require('whatwg-fetch')

const store = () => new Vuex.Store({

  state: {
    authUser: null
  },

  mutations: {
    SET_USER: function (state, user) {
      state.authUser = user
    }
  },

  actions: {
    nuxtServerInit ({
      commit
    }, {
      req
    }) {
      if (req.session && req.session.authUser) {
        commit('SET_USER', req.session.authUser)
      }
    },
    login ({
      commit
    }, {
      username,
      password
    }) {
      return fetch('/api/login', {
        // クライアントのクッキーをサーバーに送信
        credentials: 'same-origin',
        method: 'POST',
        headers: {
          'Content-Type': 'application/json'
        },
        body: JSON.stringify({
          username,
          password
        })
      })
        .then((res) => {
          if (res.status === 401) {
            throw new Error('Bad credentials')
          } else {
            return res.json()
          }
        })
        .then((authUser) => {
          commit('SET_USER', authUser)
        })
    },
    logout ({
      commit
    }) {
      return fetch('/api/logout', {
        // クライアントのクッキーをサーバーに送信
        credentials: 'same-origin',
        method: 'POST'
      })
        .then(() => {
          commit('SET_USER', null)
        })
    }
  }
})

export default store
5. 認証が必要なページを作成
/helloルートを作成するため、pages/hello.vueを作成します。
今回はindex.vueをコピーして、文面だけ変えています。
<template>
  <!-- 中身は自由に作成 -->
  <section class="container">
    <div>
      <h2 class="subtitle">
        Hello!!
      </h2>
    </div>
  </section>
</template>

<script>
export default {
  // データをこのコンポーネントにセットする必要がないため fetch() を使う
  fetch ({ store, redirect }) {
    if (!store.state.authUser) {
      return redirect('/auth')
    }
  }
}
デフォルトのindex.vueに手を加えて、/helloへのリンクを作成します。
<template>
  <section class="container">
    <div>
      <logo/>
      <h1 class="title">
        hello_nuxt
      </h1>
      <h2 class="subtitle">
        Nuxt.js project
      </h2>
      <div class="links">
        <a href="/hello" class="button--green"> go to hello page</a>  // ここ
      </div>
    </div>
  </section>
</template>

今はまだ認証がおこなわれていないので、ボタンをクリックすると/authにリダイレクトされます。
/authはまだ作成されていないので、404になります。

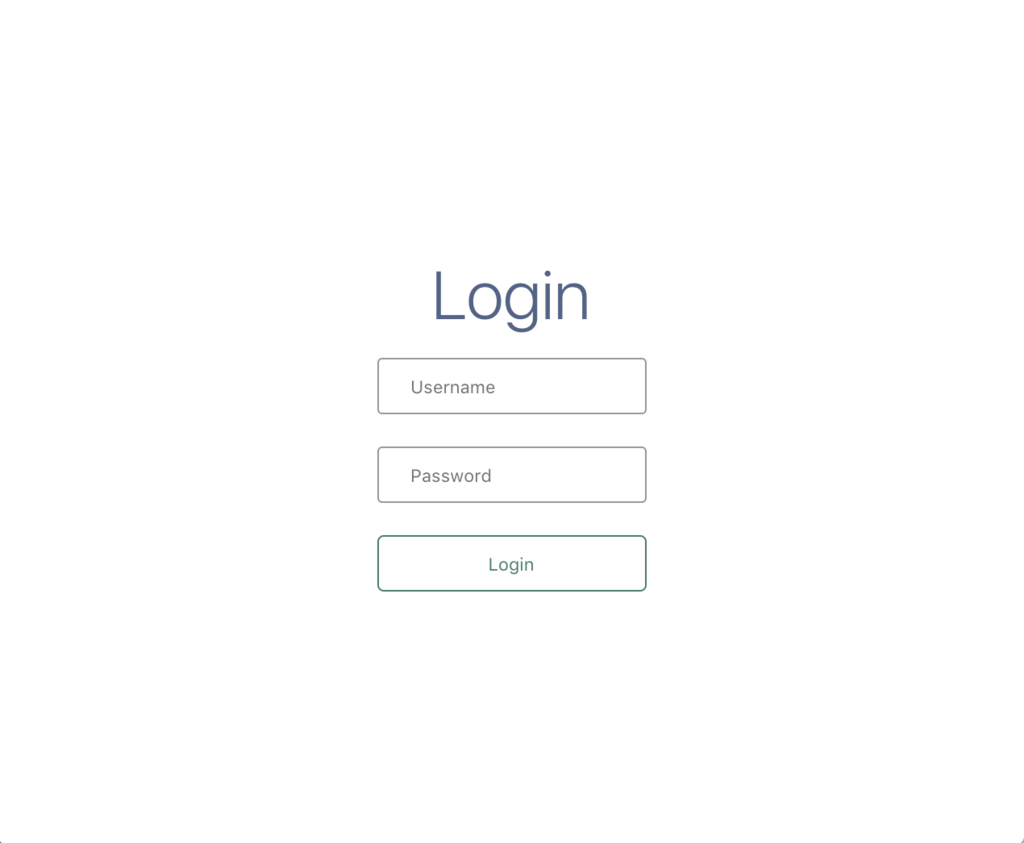
6. ログインページを作成
認証用の/authページを作成するために、pages/auth.vueを作成します。
CSSなどは適当に当ててください。
<template>
  <section class="container">
    <div>
      <h2 class="subtitle">
        Login
      </h2>
      <form v-if="!$store.state.authUser" @submit.prevent="login">
        <p class="error" v-if="formError">{{ formError }}</p>
        <div>
          <input type="text" class="form-control" v-model="formUsername" name="username" placeholder="Username" />
          <input type="password" class="form-control" v-model="formPassword" name="password"  placeholder="Password" />
          <button type="submit" class="button--green block">Login</button>
        </div>
      </form>
      <div v-else>
        <h2>Hello {{ $store.state.authUser.username }}!</h2>
        <div class="links">
          <a href="/hello" class="button--green">go to hello page</a>
          <button class="button--grey" @click="logout">Logout</button>
        </div>
      </div>
    </div>
  </section>
</template>

<script>
export default {
  data() {
    return {
      formError: null,
      formUsername: '',
      formPassword: ''
    }
  },
  methods: {
    async login() {
      try {
        await this.$store.dispatch('login', {
          username: this.formUsername,
          password: this.formPassword
        })
        this.formUsername = ''
        this.formPassword = ''
        this.formError = null
      } catch (e) {
        this.formError = e.message
      }
    },
    async logout() {
      try {
        await this.$store.dispatch('logout')
      } catch (e) {
        this.formError = e.message
      }
    }
  }
}
</script>

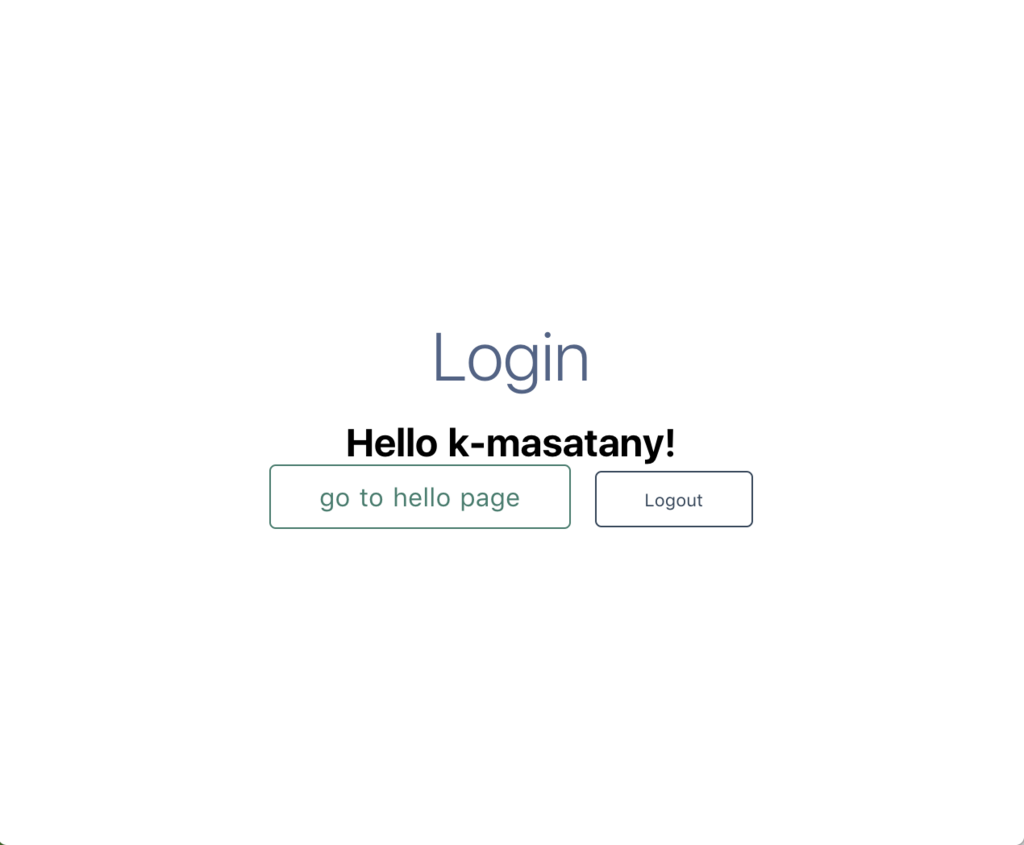
ログインしていない状態では、フォームが表示され、認証が通ったらユーザー名と/helloへのリンクが表示されます。
ログインしてみる
k-masatany/demoでログインできるので、入力します。

きちんとk-masatanyと表示されています。
それでは、改めて/helloへ移動してみます。ログイン後のボタンをクリックしてみましょう。
 ※画像はいらすとや様よりお借りしました。
無事に表示されました。(hello.vueのコードは書き換えました)
この状態であれば、/に戻って/helloへのリンクをクリックしても/authへ飛ばされることはありません。
終わりに
今回は公式ページを参考にして、Nuxt.jsにログイン機構を作成しました。
今後は、AWS Cognitoなどを使ったログインの仕組みをつけたいと思います。